Are you tired of hearing that drawings made in Revit are ugly? This post will dispel this myth and give you the tools to create beautiful, artistic 3D views in a few clicks.
1- ACTIVATE ANTI-ALIASING
Aliasing occurs when an angled line looks pixelated. To activate anti-aliasing, go to Graphic Display Options in the view and check “Smooth Lines With Anti-Aliasing”. Make sure that the Anti-Aliasing option is activated in the settings of your Revit client, under the Graphics menu.

2- ACTIVATE SILHOUETTES
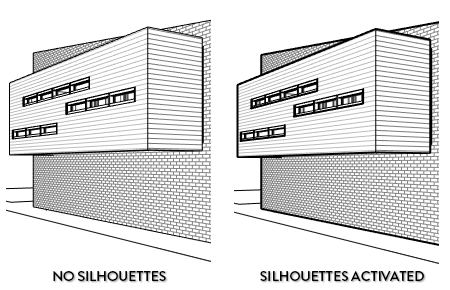
Go to Graphic Display Options in the view settings. In the silhouettes menu, select a line with a sufficient thickness. As you can see below, the 3D view becomes much more alive and gain a sense of depth.

3- ACTIVATE CAST SHADOWS
Go to Graphic Display Options in the view settings. Go to the shadow option and check “Cast Shadows”.


In the Lighting sub-menu, you can adjust the value for Shadows. Reducing the value to about 20-30 is often a good idea.


4- ACTIVATE AMBIENT SHADOWS
There is a second type of shadows available in Revit, called Ambient Shadows. They are used to mimic the natural lighting condition from a cloudy sky and reflection from surrounding objects. Go to Graphic Display Options in the view settings. Go to the shadow option and check “Ambient Shadows”.

5- USE CONSISTENT COLORS VISUAL STYLE
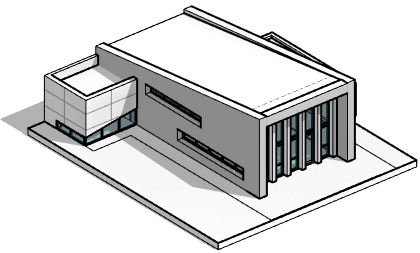
The best visual style for casual visualization is Consistent Colors. While not the most realistic style, it produce a quality good enough for conceptual styles view. This visual style is also very fast and loads quickly.

6- HAVE FUN WITH THE GRADIENT BACKGROUND
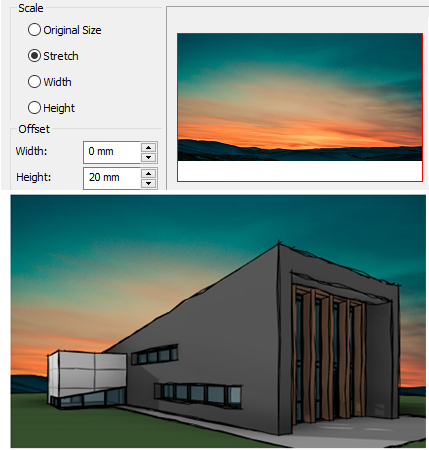
An underused tool in Revit visualization is the gradient background. The default colors are OK, but by messing around with different color schemes, you can get pretty interesting and artistic results. Go to Graphic Display Options, then to the background submenu. Pick colors for sky and horizon. In the image below, we experiment with a very emotive sunset.

7- TRY SKETCHY LINES FOR CONCEPTUAL VIEWS
Sketchy lines can be useful to produce a 3D view ressembling a conceptual sketch. When shown to a client, it indicates that the project is still evolving. Views that are over-realistic should be avoided early in the design process.
Go to Graphic Display Options, then to the Sketchy Lines sub-menu.

8- USE HIDDEN LINE STYLE WITH MATERIALS ACCENT
An alternative to the Consistent Colors style is to use the Hidden Line style with a touch of accent colors.
In the image below, we go to the Materials menu in the manage tab and set a solid fill pattern for the glass material. As you see in the 3D view, everything is white except for the windows.

9- USE AN IMAGE BACKGROUND
When you are ready for a more realistic type of view, try using a .jpeg image for the background. Go to the background tab and select your image. Use the Offset tool to adjust the height.
The DESIGN package will teach you how to seduce a client using Revit. Check it out.
Did you like this tips? We got more! We just released a brand edition of our free seasonal Pamphlets publication. It is about 3D views. Get all the tips from this post in PDF format, plus bonus tips on 3D views navigation. We promise to keep your inbox clean forever.